

As I mentioned in my last post, I bought my turkey last weekend and today I remembered to take it out of the freezer to thaw. (It’s the little victories, right?) I enjoy cooking Thanksgiving dinner and truly, I do not find it to be a big deal. Cooking a turkey is just like roasting a big chicken, right? My mom often made turkey when I was a kid — not just at Thanksgiving — so I guess it just never seemed like a big thing to me. We have a small group — just 6 of us — so I suppose that certainly helps!
Here’s what I’m planning on making (and prices if the item was purchased and not in my pantry already):

- Stuffed celery (celery will purchase fresh, olives I have, block of Philly cream cheese $1.99)
- Cranberry brie bites (need to purchase brie & crescent roll dough)
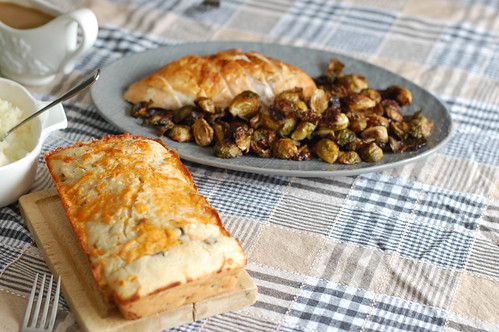
- Roast turkey (11.5 lb bird — $5.52. Tops Market always does a great sale for Thanksgiving and frozen turkeys were .48/lb with any purchase of $25)
- Crab cakes (we have a pescatarian in the family — will buy these fresh next week, planning on 8 @ 1.25 each)
- Gravy
- Mashed potatoes (bought a 5-lb bag for $2.50; 1-lb butter for 3.99)
- Stuffing (mother-in-law brings this)
- Cranberry sauce (.99/can)
- Brussels sprouts ($1.99/lb) & Butternut squash ($3.87/3-lb squash) with cranberries (.99/12-oz bag), pecans, and maple syrup
- Green beans (will purchase fresh next week)
- Cole slaw (will purchase mix fresh next week)
- Sourdough bread (Jake will make this with ingredients on hand)
- Bumbleberry pie (purchased for a school fundraiser — I think $22?)
And I think that’s about it. We have ginger ale and Diet coke, too. And of course coffee for the dessert! My favorite part is a late-night turkey sandwich while watching TV — can’t wait for that!


 Happy Cinco de Mayo! Truthfully, and probably obviously, it’s not a big holiday here for us, but I am down for any excuse to enjoy some of my favorite things! After work, a friend from up the street came over so we could catch up a bit and we enjoyed margaritas and chips and salsa. Thank was about the extent of my “celebration” LOL! I did make chicken quesadillas for dinner, too. Does that count? In my opinion any time you get to spend time with your favorite people is a good things, so hopefully you were able to enjoy as well.


 Can you believe that Thanksgiving is in just two days? Time just flies this time of year. Normally, I consider Thanksgiving my favorite holiday but due to the nature of this year I’m not quite as into it as I usually am. Nevertheless, I’m doing my best to make it a good holiday.